Call us

9681370622

E-mail us

metalastik@gmail.com

Installation


Installation Process


Steps View

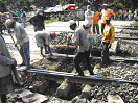
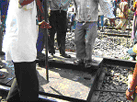
1. Removal of Old Surface & Check Rail
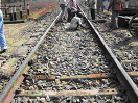
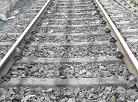
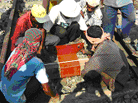
  1. The old surface of road to be excavated and check rail to be removed.
  2. All the rail and sleeper surfaces should be cleaned.
  3. If necessary, tighten any fastenings and replace any worn or missing fastening hardware.
image image

2. Ballast Filling

  1. The inside and outside of track should be filled in with ballast upto the sleeper height having good compactness.
image

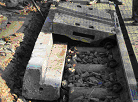
3. Foundation of Concrete Edge Beam

  1. The precast concrete beam is placed at a distance of 900 mm from rail adjacent to approach road.
  2. The top surface of beam should be parallel to the rail top height.
image

4. Laying of Rubber Panel

  1. The length of the crossing to be measured and mark off both ends and the centre point of the crossing.
  2. When installing the inner and outer panels, it should be started at the crossing centre and then to be continued to both sides.
  3. During installation of pad, polymeric inserts must be inserted inside the gap provided in the panel and ensure that position of the insert is such that the required gap should exist on both end for locking Rubber Plug.
image image

5. Rubber Plug

  1. The rubber plugs then to be placed on to the pad joints and it should be struck with the sledgehammer to insert into the pad.
image

6. End Clamp Fitment

  1. Clamps are snugly fitted at the ends. Additionally these clamps also protect the rubber pads for any hanging parts of the passing train.
image

7. Blocking of Rail / Road

  1. Complete road block for 8 hrs per track.
  2. Rail block for 3 hrs during installation.
  3. Train speed restriction at 30 KMPH.

Get in touch

Contact Us for Technology Transfer for the Rubberised Level Crossing System.This system is applicable in all climatic conditions and railway tracks across the Globe.

Call us on

9681370622

Email us

metalastik@gmail.com